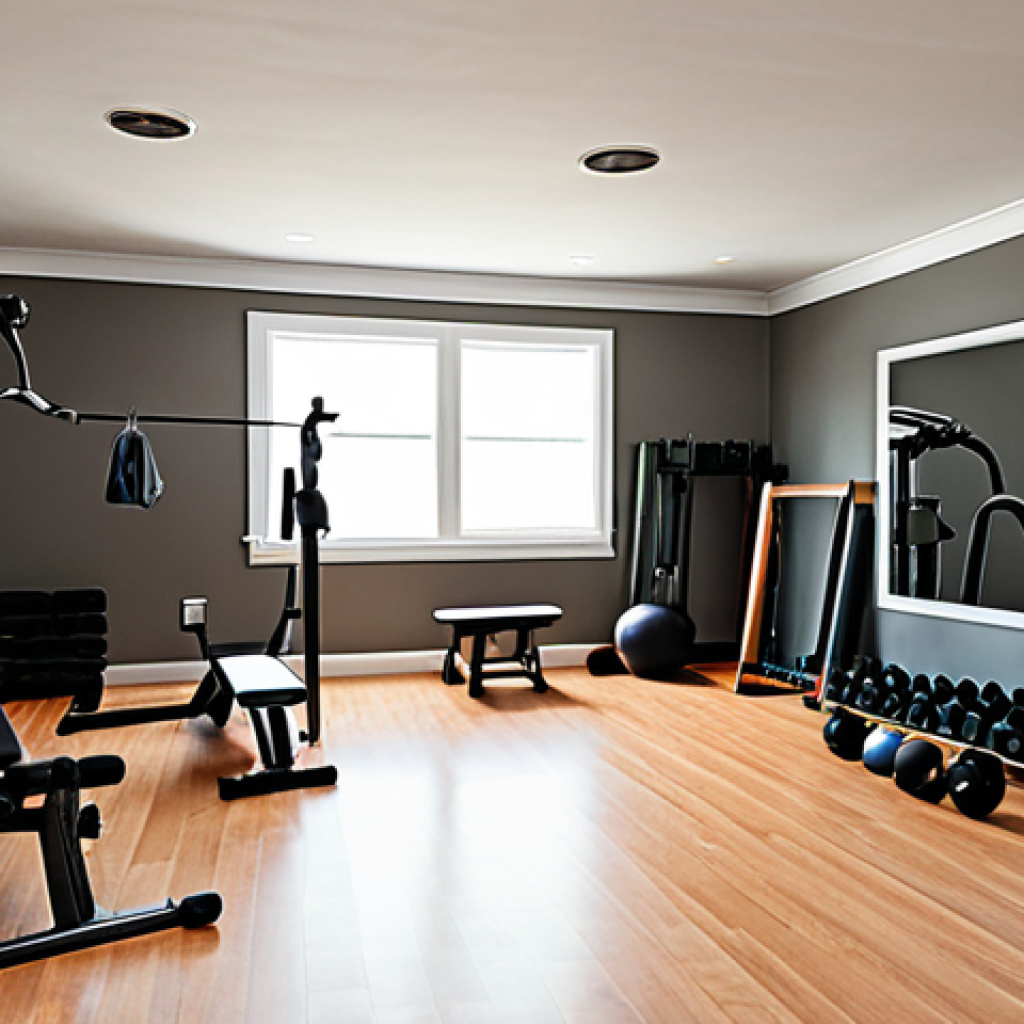
The sheer excitement of finally committing to a home gym is exhilarating, isn’t it? You envision that perfect space, the rhythmic clank of weights, the sheer convenience of working out whenever you please.
And at the absolute heart of it all? Usually, it’s a sturdy, imposing power rack. But let me tell you, from deeply personal experience, that dream can quickly morph into a frustrating spatial nightmare if you don’t meticulously account for every single inch.
I’ve been there, optimistically eyeing a beautiful rack online, only to have the crushing realization hit that the ceiling height was an inch too low, or my barbell would painfully scrape the wall with every single rep during deadlifts.
It’s never just about the rack’s tiny footprint; it’s about the dynamic dance around it, the effortless swing of a barbell, the full extension of your arms, and the crucial clearance needed for those vital spotter arms and plate storage.
In today’s increasingly compact living spaces, especially within bustling urban areas, understanding these often-overlooked dimensions isn’t just helpful—it’s absolutely critical.
With global fitness trends undeniably leaning towards incredibly accessible home setups, knowing your precise space requirements has never been more paramount to truly avoid costly mistakes and frustrating, unnecessary limitations down the line.
I’ll break down precisely what to look for.
The Unforgiving Overhead: Why Ceiling Height Isn’t Just a Number

Oh, the bitter sting of realizing your brand-new, shiny power rack is just an inch too tall for your basement ceiling! I’ve seen it, lived it, and felt that unique blend of frustration and self-reproach. It’s not just about the static height of the rack itself; it’s about the dynamic space you need *above* it for any real, practical lifting. When you’re dreaming of those perfect overhead presses, or finally conquering your first pull-up, the last thing you want is your head scraping against a low joist or, worse, your barbell colliding with the ceiling on an explosive movement. Many racks list their height, but they don’t always factor in the human element, the extra several inches your head might add during a pull-up, or the arc of a barbell during a clean and jerk. This is where many home gym enthusiasts, myself included, have made critical, costly miscalculations. You need to not only account for the rack’s maximum height but also the comfortable extension of your body and any equipment you’ll be using above your head. Don’t just measure from the floor to the ceiling; consider the highest point of your head during an overhead press *while standing on a weightlifting platform*, if you use one, or the peak of your pull-up. It truly makes all the difference between a functional, inspiring space and a constant source of annoyance.
1. Vertical Movement: OHP, Pull-ups, and Rack Pulls
When I first set up my garage gym, I was so focused on the footprint that I barely glanced at the ceiling height beyond a quick “looks okay.” Big mistake. My excitement for overhead presses quickly turned into a perpetual fear of dinging the ceiling. It’s not just the bar’s path; it’s the kinetic energy. If you’re doing a snatch or a clean and jerk, that bar isn’t moving in a perfect, controlled line. There’s an upward trajectory, a slight “pop” at the top that can push the bar higher than you anticipate. And pull-ups? Forget about it if your head is already brushing the rafters. You need enough clearance for your full range of motion, plus a safety buffer. Think about the tallest person who might ever use your gym, or the highest point your hands will reach during a full dead hang or strict pull-up. For rack pulls, while you’re not going overhead, you still need to ensure that the bar, when loaded with larger plates, doesn’t interfere with any low-hanging lights or support beams as it comes off the pins. Each exercise has its unique vertical demand that extends beyond the mere dimensions of the rack itself.
2. The Illusion of Enough: When Rack Height Meets Reality
Online specifications can be incredibly deceptive, especially for the unsuspecting home gym builder. A rack advertised as “80 inches tall” might sound perfect for your 8-foot (96-inch) ceiling. “That leaves 16 inches of clearance!” you might exclaim, filled with hope. But that’s just the structural height. Factor in rubber flooring or thicker horse stall mats (which can add 0.5 to 0.75 inches), the slight arc of your barbell during a press, or the actual height of your head and shoulders during a pull-up, and that 16 inches shrinks alarmingly fast. My personal rule of thumb now is to always aim for at least 12-18 inches of *actual usable clearance* above the tallest point of the rack, especially if pull-ups or overhead movements are part of your routine. It allows for natural human movement, slight form variations, and the dynamic nature of lifting. This buffer zone is crucial for both safety and comfort. Trying to squeeze a full overhead press into a space where your knuckles are scraping the ceiling will not only limit your gains but also increase the risk of injury. It’s truly a scenario where more space is unequivocally better, even if it feels like an unnecessary luxury during the planning stages.
Wider Than You Think: Navigating Barbell Clearance
You’ve seen the picture-perfect home gym setups online, right? Everything looks sleek, compact, perfectly arranged. But trust me, that visual rarely translates to the raw, visceral reality of lifting. The moment you unrack a barbell for a squat, or load up for a deadlift, you’ll understand. It’s not just about the width of the rack; it’s about the length of your barbell and the space you need *around* it. Most Olympic barbells are 7 feet (84 inches) long, and they don’t magically shrink inside your power rack. I once tried to fit a full-size Olympic bar into a narrow spare room, convinced I could make it work. Every single deadlift rep, the barbell plates scraped the freshly painted wall. Every single squat unracking required a careful sidestep to avoid bumping into my storage shelves. It was soul-destroying and incredibly distracting, ruining the entire workout experience. You need not only enough space to comfortably load plates on either side but also room for the dynamic movement of the barbell during lifts, ensuring it doesn’t collide with walls, other equipment, or, heaven forbid, your body. This often means allocating several feet of clear space on either side of the rack, a dimension that is frequently underestimated until the plates are on and the bar is loaded.
1. Sideline Scrapes: The Dreaded Wall vs. Barbell Battle
Picture this: you’ve got your barbell loaded, ready for a set of heavy deadlifts, and as you initiate the lift, the weight plates graze the wall, leaving an ugly scuff mark. Or, even worse, the bar hits a piece of furniture you thought was far enough away, throwing off your balance in the middle of a powerful lift. This isn’t just an aesthetic issue; it’s a safety hazard. When planning your space, remember that the standard Olympic barbell is a full 7 feet (84 inches) long. If your rack is centered in a 10-foot wide room, you might think you have 1 foot of clearance on either side of the bar ends, which seems okay. However, you need to factor in loading plates, potentially using collars, and the natural sway or flex of the bar during a heavy lift. I always recommend at least 18-24 inches of *unobstructed* clear space on either side of your rack. This provides ample room to load and unload plates without contorting yourself, allows for a natural bar path during lifts like rows or deadlifts, and ensures you won’t be constantly worried about damaging your property or, more importantly, yourself. That extra space means you can focus entirely on your form and the lift itself, rather than trying to avoid obstacles.
2. Account for Plate Load-Out and Barbell Flex
Loading and unloading heavy plates can be a surprisingly spatial activity. If you’re using 45lb or 25kg plates, they have a significant diameter. Trying to slide those onto a barbell that’s too close to a wall or another piece of equipment is not only awkward but also a potential pinch hazard. You need enough room to stand comfortably, hold the plate, and slide it onto the sleeve without feeling constrained. Beyond just the static act of loading, consider the dynamics of a heavily loaded barbell. During lifts like deadlifts, rows, or even squats, barbells can experience a degree of flex, especially at higher weights. This means the ends of the bar, where the plates are, can momentarily extend outward beyond their resting position. This isn’t a huge amount, perhaps an inch or two, but in a tight space, that’s enough to cause a collision. By providing ample side clearance, you’re accommodating not just the physical dimensions of your equipment, but also the forces and movements that occur during intense training sessions, ensuring a smooth and safe experience from start to finish.
The Front and Back Dance: Operational Space for Lifts and Spotting
When you look at a power rack, it seems like a self-contained unit, doesn’t it? Just slot it in, and you’re good to go. The reality, however, is that a power rack is merely the anchor point for a swirling vortex of movement. Most of your actual lifting takes place *outside* the confines of the uprights. Think about it: a proper squat requires you to unrack the bar and take several steps back to establish your stance. A bench press means rolling your bench into position, then possibly adjusting it for optimal foot placement, and needing space for a spotter (even a virtual one in your mind). These aren’t minor considerations; they are fundamental to how you interact with your equipment and perform your exercises safely and effectively. I’ve personally tried to make do with minimal front clearance, thinking “I just need enough room for my feet.” That quickly led to awkward walk-outs, feeling jammed against the rack, and a general sense of being confined, which is terrible for focus and safety. You need a dedicated “performance zone” in front of your rack, a clear rectangle where you can move freely, set up your lifts, and bail out if necessary. This zone is critical for everything from basic squats to more complex Olympic lifts, defining the true usability of your home gym.
1. Bench Press and Spotter Arm Protrusion
The bench press is a cornerstone exercise for many, and it demands specific spatial considerations. Your weight bench itself has a footprint, but then you need to account for its position relative to the rack’s uprights. More importantly, those crucial spotter arms or safety straps, which are your literal lifesavers, extend outwards from the rack. Depending on the rack design and the length of your spotter arms, they can protrude anywhere from 15 to 24 inches or more beyond the front of the uprights. You need enough space *in front of these arms* to comfortably slide your bench in and out, get into your pressing position, and most critically, to allow for a spotter to stand if you ever have one. If you’re doing incline presses, the bench might extend even further back. I learned this the hard way when my bench’s highest incline setting meant I was practically pressing with my feet under the barbell of the rack itself, an incredibly uncomfortable and unsafe position. Always measure the maximum protrusion of your safety arms *with a bench in place* to understand your true clearance needs.
2. Deadlifts, RDLs, and the Swing Zone
While deadlifts originate from the floor, not the rack, they are often performed directly in front of it. This means you need a dedicated, clear area where you can stand, set up, and execute the lift without fear of hitting anything behind you (like the rack itself if you’re pulling from outside) or in front of you. More dynamic movements like power cleans or snatches demand an even larger “swing zone.” The barbell’s trajectory during these lifts is not purely vertical; it arcs, requiring significant clear space in front and potentially behind you for the various phases of the lift. Even for something as simple as a Romanian Deadlift (RDL), the barbell will travel forward as you hinge, meaning you can’t be too close to a wall or obstruction in front of you. This “swing zone” isn’t just about the bar; it’s about your body’s natural movement, the slight lean, the hip hinge, and the extension. You don’t want to feel cramped, as it can compromise form and lead to injury. Aim for at least 4-5 feet of completely clear space in front of your rack for these types of movements.
3. Stepping Back: Squat Walk-Outs and Rack Entry
The squat walk-out is perhaps the most fundamental space requirement in front of a rack. After unracking the bar, you need to take 2-3 comfortable, controlled steps backward to get into your squat stance. If you don’t have enough room, you’ll feel rushed, awkward, and potentially unbalanced, which is the last thing you want with a heavy barbell on your back. This isn’t just about the steps; it’s about having enough room to *bail out* if things go wrong. If you miss a rep and need to dump the weight, you need a clear path for the bar to fall safely onto the spotter arms without hitting anything else. Similarly, when approaching the rack to re-rack the bar, you need clear lines of sight and an unobstructed path. I’ve seen people trip over kettlebells or step on a stray dumbbell because their front clearance was too cluttered. Ensuring a completely clear and wide path for entry, walk-out, and re-rack is paramount for safety and efficiency, transforming your squat experience from a potential disaster into a smooth, powerful lift.
Beyond the Cage: Accessory Footprints and Flow
A power rack, magnificent as it is, is rarely a solitary inhabitant of a home gym. It’s usually the centerpiece of an ecosystem. This ecosystem includes weight plates, barbells (sometimes multiple ones!), adjustable benches, dumbbells, kettlebells, resistance bands, and maybe even a cardio machine. Each of these items, even when “stored,” occupies valuable real estate, and more importantly, they can impede the natural flow of your workout. I remember the sheer frustration of having my plate tree just a little too close to the rack, making loading 45-pound plates a contortionist act. Or having my dumbbell rack placed such that it blocked the ideal path for my lunges. It’s not just about static storage; it’s about the dynamic interaction you have with your entire gym space. The flow of your workout – moving from squats to bench press, then to accessory work – can be severely hampered if your equipment isn’t strategically placed. This often means thinking about “pathways” and “zones” within your home gym, rather than just individual item footprints. The best home gyms feel intuitive and allow for seamless transitions between exercises, and that only happens with careful consideration of accessory placement and overall spatial flow.
1. Plate Storage, Benches, and Cable Attachments
Your weight plates, if not stored on the rack itself, require a dedicated tree or wall-mounted solution. While these are designed to be compact, they still need space around them for easy access. Trying to slide a 45lb plate off a tree that’s jammed against a wall is a recipe for pinched fingers or a dropped weight. Your adjustable bench, arguably the second most important piece of equipment, needs a home when not in use, but more critically, it needs space to be moved in and out of the rack for benching, and potentially rotated for incline or decline work. Many benches are longer than you think, especially when fully reclined. And if your rack has cable attachments, like a lat pulldown or low row, the handles, ropes, and attachments themselves need a convenient storage spot that doesn’t clutter your lifting area. I personally invested in a small, wall-mounted accessory rack just to keep all my cable attachments organized and off the floor, instantly improving my gym’s usability and safety. Every single accessory, from your smallest resistance band to your heaviest dumbbell, demands its own considered slice of your precious gym real estate.
2. The Unseen Workout: Movement Paths and Transitions
Imagine your workout as a choreographed dance. You move from the squat rack to pick up dumbbells for rows, then to your bench for presses, and maybe over to a small area for stretching. Each transition involves movement, carrying weights, and sometimes, setting up new equipment. These “movement paths” are often overlooked during the initial planning phase. If your gym is too cramped, these transitions become awkward, inefficient, and even dangerous. You might find yourself constantly shuffling equipment, tripping over things, or having to walk around obstacles. This not only adds precious minutes to your workout but also drains your energy and focus. A well-designed home gym prioritizes clear pathways between different exercise stations and storage areas. This might mean leaving a wider central aisle, ensuring there’s enough room to walk around the entire rack, or placing frequently used accessories within easy, unobstructed reach. The goal is to create a seamless flow that allows you to move effortlessly from one exercise to the next, maintaining your intensity and focus throughout your entire training session. It’s about more than just fitting things in; it’s about making the space work *for* you.
The Future-Proofing Fallacy: Why More Space Now Saves Headaches Later
When you’re starting out, it’s easy to think, “I just need enough room for the basics.” We often underestimate our own growth. Your fitness journey is exactly that – a journey. You’ll get stronger, your interests might diversify, and new exercises will pique your curiosity. That compact, minimalist setup that seemed perfect today might feel incredibly limiting a year from now. I fell into this trap myself, optimizing for “just enough” space, only to find myself longing for a cable attachment system or a dedicated deadlift platform a few months down the line. The cost of upgrading or reconfiguring a cramped space later, both in terms of money and sheer effort, far outweighs the initial investment in a slightly larger, more adaptable footprint. It’s about anticipating your evolving needs, not just your current ones. Think about the types of exercises you *might* want to do in the future, the attachments you *might* want to add, or even the possibility of a workout partner. Building in a buffer of extra space from the outset is like putting money in a savings account; it’s there when you need it, preventing future headaches and allowing your home gym to grow with you.
1. Anticipating Attachments: Lat Pulldowns and Landmines
Many power racks are modular, designed to accept a whole host of attachments that expand their functionality dramatically. Think about a lat pulldown/low row attachment – it typically extends several feet off the back of the rack. A dip station attachment might protrude significantly from the front or side. A landmine attachment, while small, needs clear space around it for rotational movements. When I initially bought my rack, I had no intention of adding a lat pulldown. A year later, it became my absolute must-have. And guess what? I hadn’t accounted for the extra 2.5 feet it added to the depth of my setup. This meant shuffling other equipment, compromising my movement pathways, and generally feeling more cramped than I would have if I’d simply planned for it. Before committing to a rack or a space, research the common attachments for that model and mentally (or even physically, with tape!) measure their added dimensions. It’s far easier to leave a little extra room now than to regret it when your future self wants to level up your training.
2. Expanding Your Training Modalities: Room for Cardio or Mobility
Your home gym might start as purely weights-focused, but it’s common for people to diversify. Perhaps you’ll want to add a compact cardio machine like a spin bike or a rowing machine. Or maybe you’ll discover the immense benefits of dedicated mobility work, requiring space for foam rolling, yoga, or dynamic stretching. These activities often require floor space *outside* the immediate vicinity of your rack. If your power rack setup consumes almost every available inch, you’ll find yourself without a dedicated area for these crucial elements of a balanced fitness routine. I once tried to squeeze a quick stretching session between my rack and the wall, constantly bumping into equipment. It was far from relaxing or effective. Consider leaving a clear 4×6 foot section, even if it’s currently unused, for future expansion into cardio, mobility, or even bodyweight exercises. This foresight ensures your home gym remains versatile and supports all facets of your fitness journey, rather than becoming a single-purpose, limiting space.
Ergonomics and Safety: Creating Your Personal Performance Bubble
Beyond simply fitting the equipment, a truly great home gym prioritizes ergonomics and safety. This isn’t just about avoiding accidents; it’s about optimizing your environment for peak performance and long-term health. Think of it as creating a personal “performance bubble” around your rack. Within this bubble, every movement feels natural, every lift feels secure, and your focus remains entirely on the exercise, not on avoiding obstacles or feeling cramped. I’ve been in tight gyms where I felt like I was constantly bumping into things, or had to contort my body just to load a plate. It’s not only frustrating but genuinely unsafe. When you’re lifting heavy, any distraction, any slight misstep caused by a lack of space, can have serious consequences. This holistic approach to space planning ensures that your gym isn’t just a collection of equipment, but a meticulously designed training environment where you can push your limits confidently and safely, without compromise. It’s the difference between a functional space and a truly inspiring one.
1. The “Safety Zone” Around Your Rack
Every piece of gym equipment, especially a power rack, should have an invisible “safety zone” around it. This is the minimum clear space required to perform exercises safely, load weights comfortably, and, if necessary, bail out of a lift without hitting anything. For a power rack, this zone extends not just forward and backward for squats and bench presses, but also sideways for loading plates and moving around the bar. My recommendation, based on years of personal trial and error, is a minimum of 3-4 feet of clear space in front and behind the rack, and at least 2-3 feet on either side of the loaded barbell ends. This generous zone allows for natural body mechanics, ensures you have ample room to load and unload plates without feeling confined, and provides a crucial buffer if you ever need to quickly step away from a failed lift. It’s an investment in your safety and the longevity of your training. Do not compromise on this; it’s far too important.
2. Optimizing Flow for Multi-Exercise Circuits
If your training involves circuits, supersets, or simply moving quickly between different exercises, the layout and available space become even more critical. Imagine finishing a set of squats, then needing to immediately transition to a set of dumbbell rows, followed by pull-ups. If your dumbbells are across the room, or your pull-up bar is blocked by a bench, your flow is broken, your heart rate drops, and your intensity wanes. A well-optimized space allows for seamless transitions. This might mean placing your dumbbell rack within easy reach of the power rack, ensuring your adjustable bench can be quickly moved in and out of position, or having resistance bands easily accessible. I personally like to visualize my entire workout routine, step-by-step, and then mentally (or physically, by walking it out!) trace my path through the gym. Are there any bottlenecks? Do I have to move anything unnecessary? This “flow optimization” is a powerful, often overlooked, aspect of maximizing your home gym’s efficiency and impact on your training.
Measuring Like a Pro: Tips for Your Pre-Purchase Reconnaissance
Alright, so you’re armed with the knowledge of what space you *actually* need. Now, how do you translate that into practical, pre-purchase measurements? This is where many eager home gym builders go wrong, relying solely on advertised dimensions. From personal experience, a tape measure is your best friend, but it’s how you use it that counts. Don’t just measure the room and then compare it to the rack’s listed footprint. You need to simulate the *activity* within that space. This means thinking dynamically, not statically. It’s about more than just numbers on a spec sheet; it’s about visualizing your body in motion, the barbell arcing, and plates being loaded. This meticulous approach might seem overly cautious, but trust me, it’s the difference between a frustrating spatial compromise and a perfectly functional, inspiring home gym that you’ll love training in for years to come. Take your time with this step – it’s truly the most critical part of the entire process.
1. Don’t Just Measure the Rack: Measure the *Exercise*
This is my absolute golden rule for home gym planning. Don’t just measure the rack’s dimensions. Instead, get a broomstick or a piece of PVC pipe, hold it like a barbell, and walk through the movements you intend to perform. Pretend to unrack a squat and take your steps back. Mimic an overhead press, ensuring your hands and the imaginary bar clear the ceiling. Lie on the floor where your bench would go and simulate a bench press, noting where your head and feet land relative to the rack. For deadlifts, stand where you’d pull and see how much clearance your “barbell” has on either side. This hands-on, experiential measurement technique will reveal spatial conflicts that simple tape measure readings never could. It’s how I discovered that my initial ceiling height calculation was off by just enough to make overhead movements impossible, forcing a last-minute rack change that saved me immense frustration down the line. It’s messy, it’s awkward, but it is incredibly effective for true spatial understanding.
2. The Cardboard Cutout Method: A Real-World Test
For those who are truly serious about precision, or who are working with a particularly challenging space, try the “cardboard cutout” method. Get some large sheets of cardboard or even just newspapers and tape them together to create a footprint on the floor that matches the dimensions of your chosen power rack, plus all your estimated clearance zones (front, back, sides). Place your weight bench, plate tree, or any other significant pieces of equipment onto this layout. Then, actually walk around it, simulate movements, and see how the space *feels*. Does it flow? Can you load plates without bumping into the wall? Is there enough room to walk around the rack comfortably? This tactile, real-world simulation exposes any hidden bottlenecks or underestimated space needs before you commit to purchasing and assembling heavy equipment. It’s a low-cost, high-reward method for validating your spatial assumptions and preventing costly regrets.
3. Documenting Your Space: Photos and Floor Plans
Before you even start looking at racks online, take detailed photos and measurements of your proposed gym space. Measure the length, width, and ceiling height of the room at multiple points, especially if the floor or ceiling isn’t perfectly level. Note the location of outlets, windows, doors (and their swing path!), and any obstructions like support beams or water heaters. Sketch a simple floor plan, even if it’s just a rough drawing, and mark these elements. This comprehensive documentation will be invaluable when you’re comparing different rack models and their dimensions. I like to keep a dedicated folder on my phone with these photos and measurements, so I can easily reference them when browsing equipment. This organized approach prevents costly mistakes and ensures that when your new power rack arrives, it slides seamlessly into its designated, perfectly planned home.
| Rack Type | Typical Footprint (W x D) | Recommended Front/Back Clearance | Recommended Side Clearance (per side) | Minimum Ceiling Height |
|---|---|---|---|---|
| Half Rack | 48-50″ x 24-36″ | 48-60″ | 24-36″ | 84-90″ |
| Full 4-Post Rack | 48-50″ x 41-48″ | 48-60″ | 24-36″ | 84-90″ |
| Full 6-Post Rack | 48-50″ x 60-70″ | 48-60″ | 24-36″ | 84-90″ |
| Wall-Mounted Rack (Fold-Away) | 24-30″ x 4-24″ (folded) | 48-60″ | 24-36″ | 84-90″ |
Wrapping Up
Navigating the spatial puzzle of a home gym can feel overwhelming, but as someone who’s wrestled with every inch, I promise you, the foresight pays off exponentially. Don’t just buy a rack and hope for the best; truly measure, visualize, and plan your space like it’s the most critical blueprint you’ll ever create. A well-considered layout isn’t just about fitting everything in; it’s about crafting an environment that inspires, empowers, and most importantly, keeps you safe. Invest the time now, and you’ll build a gym that not only meets your needs but truly elevates your entire fitness journey.
Useful Information to Know
1. Always add at least 6 inches to any advertised rack height to account for uneven floors, rubber mats, or any minor miscalculations.
2. Olympic barbells are standard at 7 feet (84 inches) long; ensure you have ample clearance for the plates on either side, ideally 2-3 feet per side.
3. Consider future attachments like lat pulldowns – they can add 2-3 feet to the rack’s depth, so plan for that space now.
4. Measure door swing paths and window clearance, as these often become unexpected obstacles in smaller spaces.
5. Don’t forget dedicated space for mobility work or a cardio machine; a truly versatile gym needs more than just lifting room.
Key Takeaways
Prioritize vertical clearance for overhead movements and pull-ups, allowing for dynamic body and bar movement. Ensure ample side clearance for barbell loading and dynamic lifts like deadlifts and rows. Allocate significant front and back space for squat walk-outs, bench press setup, and a “swing zone” for Olympic lifts. Factor in the footprint and operational needs of all accessories, considering movement paths and transitions. Future-proof your gym by planning for potential attachments and diversified training modalities. Finally, establish a generous “safety zone” around your equipment and utilize hands-on measurement techniques like the broomstick or cardboard cutout method to validate your spatial planning.
Frequently Asked Questions (FAQ) 📖
Q: Okay, so you’ve painted a pretty vivid picture of spatial nightmares! What are the absolute most common, bone-headed dimension mistakes people make when setting up a home gym, especially with a power rack, that I should really watch out for?
A: Oh, believe me, I’ve been there, optimistically measuring and then getting hit with the cold, hard reality. The number one killer, hands down, is ceiling height.
Everyone measures the rack itself, but forgets about the barbell extending above it during an overhead press, or even just racking it. I’ve seen people literally bang their head on their basement ceiling during a press, or scrape the paint off because they didn’t account for the bar’s arc.
Another huge one is wall clearance, particularly for deadlifts or any Olympic lifts. You think you have enough space for the rack, but then you’re trying to deadlift and your barbell plates are painfully grinding against the drywall with every rep.
And honestly, people often overlook the dynamic space—it’s not just the rack’s static footprint. It’s the swing of a barbell during a clean, the full extension of your arms, the crucial clearance needed for those spotter arms when you bail on a heavy squat, and even the space needed to load and unload plates efficiently.
That seemingly tiny “extra inch” for plate storage adds up to a surprising amount of depth you simply must have clear behind or beside the rack. Trust me, an inch too low on your ceiling or an inch too close to a wall for certain lifts isn’t just annoying; it’s a soul-crushing discovery that can limit your entire workout repertoire.
Q: Alright, you’ve convinced me that measuring is paramount. Beyond just grabbing a tape measure, what are some pro tips or often-missed considerations when I’m actually mapping out my space to ensure my power rack and I can coexist happily and safely?
A: This is where you really need to channel your inner architect, not just your inner weightlifter. Seriously, don’t just measure the static footprint of the rack.
My biggest piece of advice, something I learned the hard way, is to literally grab a broomstick or a PVC pipe that’s the same length as a standard barbell (usually 7 feet for Olympic bars), and simulate a deadlift or an overhead press in the space.
See where that bar actually goes! This lets you visualize the dynamic clearances needed for those movements you’re planning. Also, think about your own body mechanics.
If you’re 6 feet tall, your arm span for an overhead press is going to demand more vertical clearance than someone shorter. Factor in future accessories too – a dip bar attachment or a landmine attachment can add extra width or depth to your setup.
And don’t forget the practicalities beyond just lifting: where will you stand to load plates without bumping into something? Is there enough room to clean up after your session?
It’s all about envisioning the entire workout experience, from setup to cool-down, in that designated space. It might sound a bit extra, but a few minutes of careful ‘dry-run’ planning can save you hundreds, if not thousands, in returns and frustrations.
Q: You mentioned avoiding ‘costly mistakes and frustrating, unnecessary limitations.’ Beyond just the initial purchase regret, what are the actual real-world consequences of not getting these dimensions right, and how can I practically ‘try before I buy’ or mitigate those risks without having to ship a massive rack back?
A: Oh, the consequences can be more than just financial, though a return shipping label for a 200lb power rack is definitely a costly punch to the gut! Real-world consequences range from outright injury risk – think banging a loaded barbell into a low ceiling during a squat, or hitting a wall mid-deadlift.
It also severely limits your exercise selection; if you can’t press overhead or do proper deadlifts, you’ve essentially neutered your home gym’s potential.
This leads to diminished motivation, which is the last thing you want when you’re trying to build a consistent habit. You end up with an expensive, underutilized piece of equipment gathering dust, rather than an empowering workout hub.
To ‘try before you buy’ without actually buying, get creative! Seriously, grab some painter’s tape or even some old cardboard boxes and lay out the exact footprint of that rack on your floor.
Mark out the height on your wall where the top of the rack would be. Then, using that broomstick or PVC pipe I mentioned, simulate your main lifts. Stand in the space, walk around, pretend to load plates.
If you’re buying online, scour user reviews for mentions of space issues or tight fits in common garage or basement setups. Don’t be afraid to reach out to the manufacturer or even online forums with your specific dimensions.
Trust me, it’s worth a bit of pre-purchase fuss to ensure your dream home gym doesn’t turn into a cramped, injury-prone nightmare.
📚 References
Wikipedia Encyclopedia
구글 검색 결과
구글 검색 결과
구글 검색 결과
구글 검색 결과
구글 검색 결과